You are at the beginning stages of creating a blog using Blogger.
You know how to write a blog post.
Now it's time to add other content along the sides of your blog. These are called gadgets.
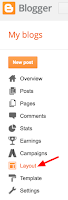
1. Go to Layout.
They can be different sizes. You may want to choose one that fills the entire margin, or just half of the margin. I have already added some gadgets, which you can see on this blog.
3. Add a Sidebar gadget.
 Here are some suggestions for gadgets you might want to add:
•HTML/Javascript - This is great for embedding your Twitter tweets, or any other HTML embed code you might want to put on your blog.
•Profile - Great for letting people know who you are (and show them why you should keep reading your blog).
•Labels - Give them easy access to the labels that you categorize your blog posts with.
•Link List or Blog List - Here is where you show your blog readers what blogs you read. What influences and inspires you? Where can they go for more great content?
•Translate - If your audience is multi-lingual, this one would be great for you.
When you have posted a lot of content, these two would be important to have:
•Search Box - They should be able to search your blog
•Popular Posts - Promote your most popular blog posts
4. Re-arrange your gadgets.

Click and hold on the vertical dots, and drag your gadgets around.
5. Lather-Rinse-Repeat (Revise)
Maybe now you realize that you chose the wrong size for the gadget that you chose. Go back and re-add the gadget with the size you prefer.
You know how to write a blog post.
Now it's time to add other content along the sides of your blog. These are called gadgets.
1. Go to Layout.

2. Choose a size for your Sidebar gadget.
 |
3. Add a Sidebar gadget.

•HTML/Javascript - This is great for embedding your Twitter tweets, or any other HTML embed code you might want to put on your blog.
•Profile - Great for letting people know who you are (and show them why you should keep reading your blog).
•Labels - Give them easy access to the labels that you categorize your blog posts with.
•Link List or Blog List - Here is where you show your blog readers what blogs you read. What influences and inspires you? Where can they go for more great content?
•Translate - If your audience is multi-lingual, this one would be great for you.
When you have posted a lot of content, these two would be important to have:
•Search Box - They should be able to search your blog
•Popular Posts - Promote your most popular blog posts
4. Re-arrange your gadgets.

Click and hold on the vertical dots, and drag your gadgets around.
5. Lather-Rinse-Repeat (Revise)
Maybe now you realize that you chose the wrong size for the gadget that you chose. Go back and re-add the gadget with the size you prefer.


